
)
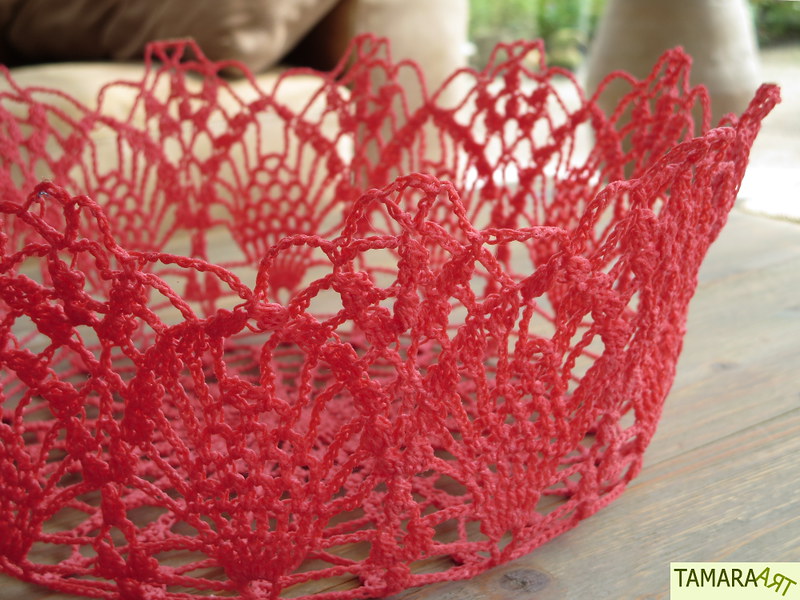
Deze bestelling lag al heel (héél) lang half afgemaakt in mijn WIP mandje... Deze week heb ik hem eindelijk helemaal afgemaakt. Ze waren besteld door een collega, die zei dat ik rustig de tijd kon nemen. Gelukkig maar. =)
This order has been in my WIP basket for a long (looong) time... I finally got to finish it this week. My colleague ordered them, and she told me to take all the time I needed, fortunately. =)
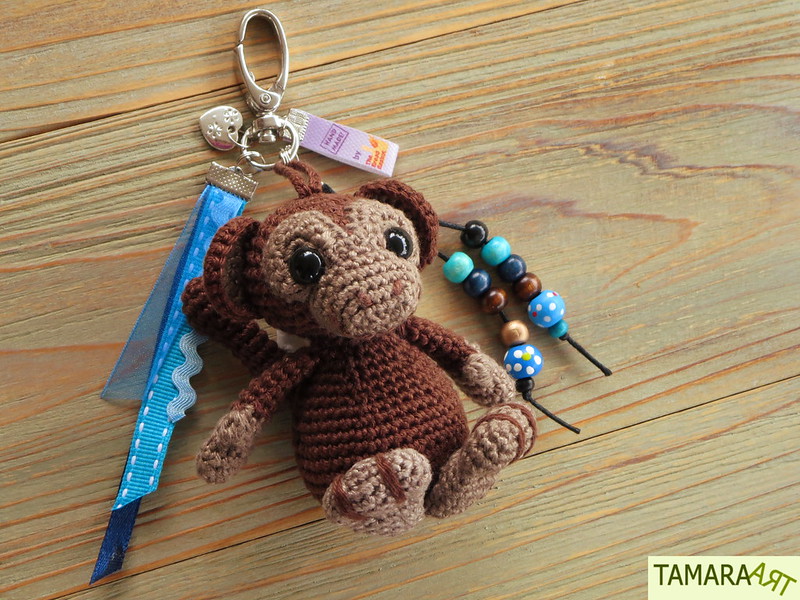

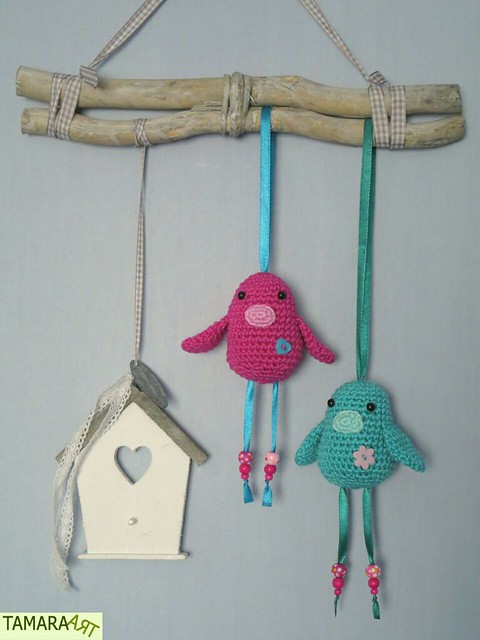
Het kleine aapje, dat ik al eerder had laten zien, was ook een deel van de bestelling. Ik heb het nu versierd met wat lintjes en kraaltjes. Samen met nog twee tashangers is de bestelling nu helemaal klaar om afgeleverd te worden!
The little monkey, which I have shown before, was also part of the order. I've decorated it with some beads and ribbons now. Together with two other bag charms, this order is ready for delivery!


De patroontjes zijn hier te vinden:
Dwergpapegaai (gratis)
Eekhoorntje (gratis)
Aapje (kooppatroon)
Poesje: Zie hieronder
Here's where you can find the patterns:
Lovebird (free)
Squirrel (free)
Monkey (payed)
Kitty: See below

)
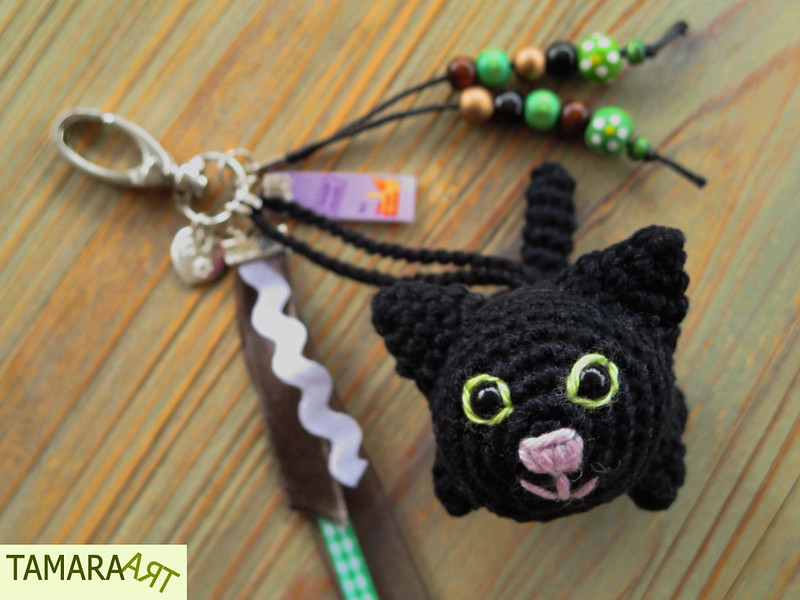
Het poesje heb ik ook zelf bedacht. Ik heb opgeschreven wat ik heb gedaan, je vindt de beschrijving hieronder. Ik heb het patroontje nog niet weer uitgetest. Mocht je een fout tegenkomen, laat het me dan maar even weten. =)
Kop
+ lichaam + staart
1.
6 vasten in verstelbare ring (6)
2.
[2 vasten in één steek] 6x (12)
3. [1 vaste – 2 vasten in één steek] 6x (18)
4. [2 vasten – 2 vasten in één steek] 6x (24)
5. [3 vasten – 2 vasten in één steek ] 6x (30)
6. vasten rondom (30)
7. vasten rondom (30)
8. vasten rondom (30)
9. vasten rondom (30)
10. vasten rondom (30)
11. vasten rondom (30)
12. [3 vasten – twee steken samenhaken met 1 vaste]
6x (24)
13. [2 vasten – twee steken samenhaken met 1 vaste]
6x (18)
14. [1 vaste – twee steken samenhaken met 1 vaste]
6x (12)
15. [2 vasten in één steek] 4x – [2 stokjes in één
steek] 6x – [2 vasten in één steek] 2x (24)
16. [3 vasten – 2 vasten in één steek] 6x (30)
17. vasten rondom (30)
18. [3 vasten – twee steken samenhaken met 1 vaste]
6x (24)
19. vasten rondom (24)
20. vasten rondom (24)
21. [2 vasten – twee steken samenhaken met 1 vaste]
6x (18)
22. vasten rondom (18)
23. [1 vaste – twee steken samenhaken met 1 vaste]
6x (12)
24. [twee steken samenhaken met 1 vaste] 6x (6)
25. vasten rondom (6)
26. 3 stokjes – 3 vasten (6)
27. vasten rondom (6)
28. vasten rondom (6)
29. vasten rondom (6)
30. vasten rondom (6)
31. vasten rondom (6)
32. vasten rondom (6)
33. vasten rondom (6)
Draad door alle lussen – aantrekken – afhechten
Oor 2x
1. 4 vasten in verstelbare ring (4)
2. vasten rondom (4)
3. [2 vasten in één steek] 4x (8)
4. [1 vaste – 2 vasten in één steek] 4x (12)
Afsluiten met een halve vaste – afhechten
Achterpoot 2x
1. 6 vasten in verstelbare ring (6)
2. vasten rondom (6)
3. vasten rondom (6)
4. vasten rondom (6)
5. [2 vasten in één steek] 6x (12)
6. [3 vasten – 2 vasten in één steek] 3x (15)
7. vasten rondom (15)
8. vasten rondom (15)
9. [3 vasten – twee steken samenhaken met 1 vaste]
3x (12)
10. [twee steken samenhaken met 1 vaste] 6x (6)
Draad door alle lussen – aantrekken – afhechten
Voorpoot 2x
1. 6 vasten in verstelbare ring (6)
2. vasten rondom (6)
3. vasten rondom (6)
4. vasten rondom (6)
5. vasten rondom (6)
6. vasten rondom (6)
Afhechten
Gebruik veiligheidsoogjes. Borduur rond elk oog een
groen draadje. Gebruik een roze draad om het snuitje te borduren.
---
The kitty is something I also came up with myself. I kept notes of what I did, you'll find them below. I didn't test this pattern. If you find errors, please let me know. =)
Head
+ body + tail
1.
adjustable ring with 6 single crochet (6)
2.
[2 single crochet in one stitch] 6x (12)
3.
[1 single crochet – 2 single crochet in one stitch] 6x (18)
4. [2 single crochet – 2 single crochet in one
stitch] 6x (24)
5. [3 single crochet – 2 single crochet in one
stitch] 6x (30)
6. single crochet all around (30)
7. single crochet all around (30)
8. single crochet all around (30)
9. single crochet all around (30)
10. single crochet all around (30)
11. single crochet all around (30)
12. [3 single crochet – crochet two stitches
together with 1 single crochet] 6x (24)
13. [2 single crochet – crochet two stitches
together with 1 single crochet] 6x (18)
14. [1 single crochet – crochet two stitches
together with 1 single crochet] 6x (12)
15. [2 single crochet in one stitch] 4x – [2 double
crochet in one stitch] 6x – [2 single crochet in one stitch] 2x (24)
16. [3 single crochet – 2 single crochet in one
stitch] 6x (30)
17. single crochet all around (30)
18. [3 single crochet – crochet two stitches
together with 1 single crochet] 6x (24)
19. single crochet all around (24)
20. single crochet all around (24)
21. [2 single crochet – crochet two stitches
together with 1 single crochet] 6x (18)
22. single crochet all around (18)
23. [1 single crochet – crochet two stitches
together with 1 single crochet] 6x (12)
24. [crochet two stitches together with 1 single
crochet] 6x (6)
25. single crochet all around (6)
26. 3 double crochet – 3 single crochet (6)
27. single crochet all around (6)
28. single crochet all around (6)
29. single crochet all around (6)
30. single crochet all around (6)
31. single crochet all around (6)
32. single crochet all around (6)
33. single crochet all around (6)
Yarn through all loops – pull – finish off
Ear 2x
1. adjustable ring with 4 single crochet (4)
2. single crochet all around (4)
3. [2 single crochet in one stitch] 4x (8)
4. [1 single crochet – 2 single crochet in one
stitch] 4x (12)
Join with slip stitch – finish off
Back leg 2x
1. adjustable ring with 6 single crochet (6)
2. single crochet all around (6)
3. single crochet all around (6)
4. single crochet all around (6)
5. [2 single crochet in one stitch] 6x (12)
6. [3 single crochet – 2 single crochet in one
stitch] 3x (15)
7. single crochet all around (15)
8. single crochet all around (15)
9. [3 single crochet – crochet two stitches together
with 1 single crochet] 3x (12)
10. [crochet two stitches together with 1 single
crochet] 6x (6)
Yarn through all loops – pull – finish off
Front leg 2x
1. adjustable ring with 6 single crochet (6)
2. single crochet all around (6)
3. single crochet all around (6)
4. single crochet all around (6)
5. single crochet all around (6)
6. single crochet all around (6)
Finish off
Use safety eyes. Embroider with green yarn around the
eyes. Use pink yarn to embroider the nose.


)
)